
客服微信

本文为云贝教育 刘峰 原创,请尊重知识产权,转发请注明出处,不接受任何抄袭、演绎和未经注明出处的转载。
一、安装基本信息
Ø 数据库安装版本 19c单机
Ø 操作系统版本 Linux 8+
如果是运行数据库,建议更改为英语使用UTF8,查看命令如下:
localectl status|grep LANG
设置语言
rhel7

localectl set-locale LANG=en_US.UTF8 && localectl status|grep LANG

其它的版本

LANG="en_US.UTF-8"

grep LANG  /etc/sysconfig/i18n

cp /etc/sysconfig/i18n /etc/sysconfig/i18n_`date +"%Y%m%d_%H%M%S"`&& sed -i "/LANG=/d" /etc/sysconfig/i18n && echo "LANG=\"en_US.UTF-8\"" >>/etc/sysconfig/i18n && grep LANG /etc/sysconfig/i18n
查看时间时区
timedatectl
设置时区
timedatectl set-timezone "Asia/Shanghai"

timedatectl set-time HH:MM:SS
timedatectl set-time "2012-10-30 18:17:16"
--将系统时间同步给硬件时间
timedatectl set-local-rtc 1
2.3、修改主机名
hostnamectl set-hostname ora19c
1)防火墙
systemctl stop    firewalld
systemctl disable firewalld

2)selinux
--查看
getenforce

SELINUX=`grep ^SELINUX= /etc/selinux/config`

if [ $SELINUX != "SELINUX=disabled" ];then
  cp /etc/selinux/config /etc/selinux/config.bak
  sed -i 's/^SELINUX=/#SELINUX=/g' /etc/selinux/config
  sed -i '$a SELINUX=disabled' /etc/selinux/config
else
  echo "SELINUX is already disabled"
fi


3)透明大页
--查看
[root@pgDB01 ~]# cat /sys/kernel/mm/transparent_hugepage/enabled
[always] madvise never

--关闭
sed -i 's/quiet/quiet transparent_hugepage=never/' /etc/default/grub
grub2-mkconfig -o /boot/grub2/grub.cfg
reboot
2.5、修改shm自动挂载
cp /etc/fstab /etc/fstab_`date +"%Y%m%d_%H%M%S"`
echo "tmpfs    /dev/shm    tmpfs    rw,exec    0 0">>/etc/fstab
2.6、修改host文件
cp /etc/hosts /etc/hosts_`date +"%Y%m%d_%H%M%S"`
echo '
192.168.74.129 ora19c1
'>> /etc/hosts
cat /etc/hosts
--脚本配置
cp /etc/sysctl.conf /etc/sysctl.conf.bak
echo
MemTotal=`grep MemTotal /proc/meminfo | awk '{print $2}'`
PAGE_SIZE=`getconf PAGE_SIZE`
shmmax=`expr $MemTotal \* 1024`
shmall=`expr $shmmax / $PAGE_SIZE`
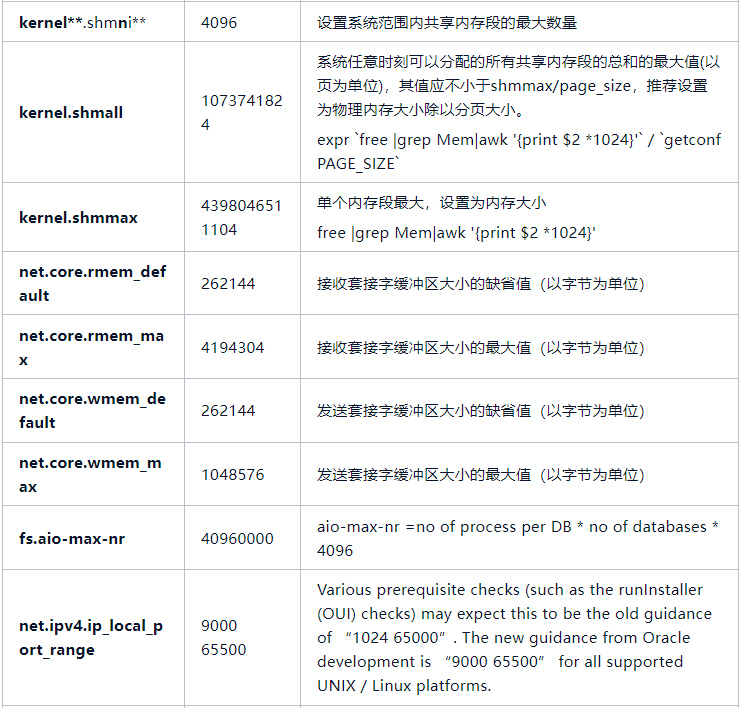
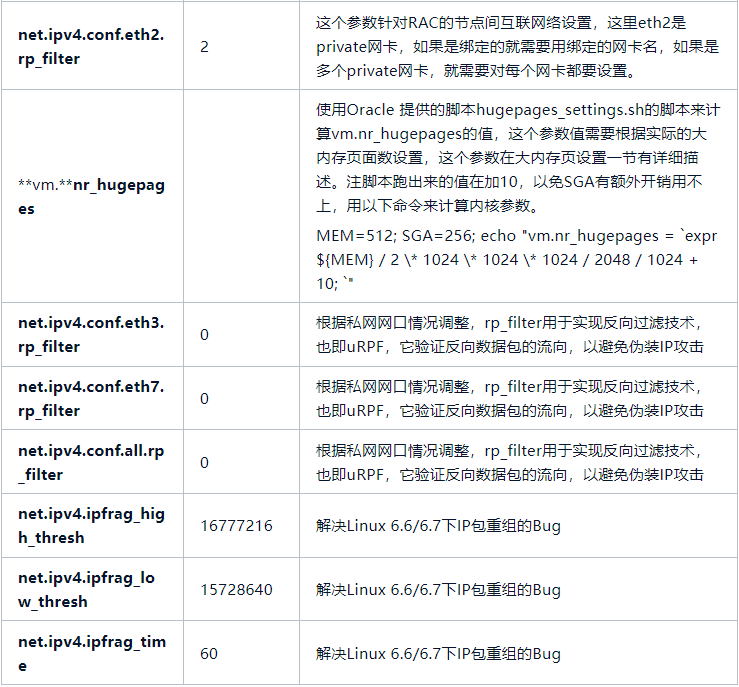
cat >> /etc/sysctl.conf << EOF fs.file-max = 6815744 kernel.sem = 10000 10240000 10000 1024 kernel.shmmni = 4096 kernel.shmall = $shmall kernel.shmmax = $shmmax net.ipv4.ip_local_port_range = 9000 65500 net.core.rmem_default = 16777216 net.core.rmem_max = 16777216 net.core.wmem_max = 16777216 net.core.wmem_default = 16777216 fs.aio-max-nr = 6194304 vm.dirty_ratio=20 vm.dirty_background_ratio=3 vm.dirty_writeback_centisecs=100 vm.dirty_expire_centisecs=500 vm.swappiness=10 vm.min_free_kbytes=524288 net.core.netdev_max_backlog = 30000 net.core.netdev_budget = 600 net.ipv4.conf.all.rp_filter = 2 net.ipv4.conf.default.rp_filter = 2 #vm.nr_hugepages =51200 EOF --启用参数 sysctl --system --大页计算 使用Oracle 提供的脚本hugepages_settings.sh的脚本来计算vm.nr_hugepages的值,这个参数值需要根据实际的大内存页面数设置,这个参数在大内存页设置一节有详细描述。注脚本跑出来的值在加10,以免SGA有额外开销用不上,用以下命令来计算内核参数。 MEM=512; SGA=256; echo "vm.nr_hugepages = `expr ${MEM} / 2 \* 1024 \* 1024 \* 1024 / 2048 / 1024 + 10; `"
2)参数设置

wget -O /etc/yum.repos.d/CentOS-Base.repo http://mirrors.aliyun.com/repo/Centos-8.repo
rpm -q --qf '%{NAME}-%{VERSION}-%{RELEASE} (%{ARCH})\n' \
bc  \
binutils  \
compat-libcap1  \
compat-libstdc++  \
elfutils-libelf  \
elfutils-libelf-devel  \
fontconfig-devel  \
glibc  \
glibc-devel  \
ksh  \
libaio  \
libaio-devel  \
libX11  \
libXau  \
libXi  \
libXtst  \
libXrender  \
libXrender-devel  \
libgcc  \
libstdc++  \
libstdc++-devel  \
libxcb  \
make  \
net-tools  \
nfs-utils  \
python  \
python-configshell  \
python-rtslib  \
python-six \
targetcli \
smartmontools \
sysstat \
kmod-oracleasm \
kmod-libs \
yum -y install targetcli python python-configshell python-rtslib python-six bc binutils compat-libstdc compat-libcap1 gcc gcc-c++ libX11 libXau libXi libXtst libXrender libXrender-devel libxcb glibc glibc-common  glibc-devel fontconfig-devel ksh libaio libaio-devel libgcc libstdc++ libstdc++-devel make sysstat openssh-clients compat-libcap1   xorg-x11-utils xorg-x11-xauth elfutils unixODBC unixODBC-devel libXp elfutils-libelf elfutils-libelf-devel smartmontools

yum install -y /soft/*.rpm

yum -y install /lib64/libnsl.so.1
日常管理工作安装
yum -y install unzip sysstat setuptool telnet iotop openssh-clients net-tools unzip libvncserver tigervnc-server device-mapper-multipath dstat lsof ntp psmisc redhat-lsb-core parted xhost strace showmount expect tcl
1)创建用户组
groupadd -g 54321 oinstall
groupadd -g 54322 dba
groupadd -g 54323 oper
groupadd -g 54324 backupdba
groupadd -g 54325 dgdba
groupadd -g 54326 kmdba
groupadd -g 54327 asmdba
groupadd -g 54330 racdba
2)创建oracle用户
useradd -g oinstall -G dba,oper,backupdba,dgdba,kmdba,asmdba,racdba -u 6000 oracle
--修改oracle密码
echo "Oracle123()"|passwd oracle --stdin
3)创建目录
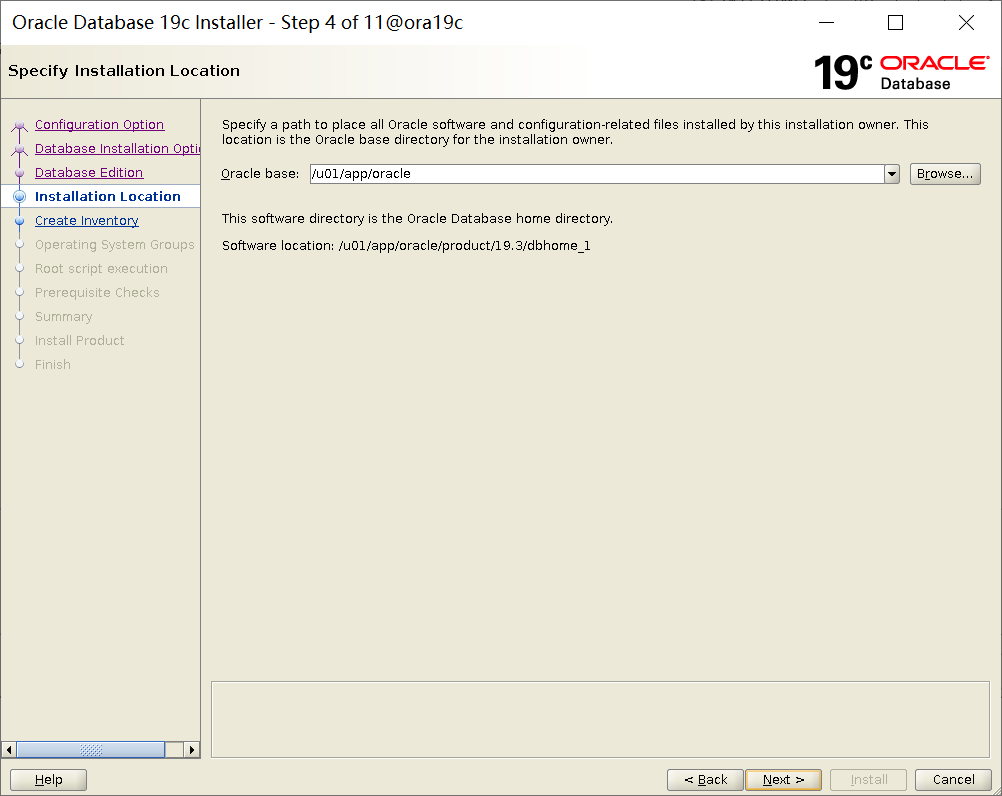
mkdir -p /u01/app
mkdir -p /u01/app/oracle
mkdir -p /u01/app/oracle/product/19.3/dbhome_1
chown -R oracle:oinstall /u01/app
chmod -R 775 /u01/app
2.11 配置用户环境变量
cat >> /home/oracle/.bash_profile << "EOF" export TMP=/tmp export TMPDIR=$TMP export ORACLE_BASE=/u01/app/oracle export ORACLE_HOME=$ORACLE_BASE/product/19.3/dbhome_1 export ORACLE_SID=prod1 export PATH=/usr/sbin:$PATH export PATH=$ORACLE_HOME/bin:$ORACLE_HOME/OPatch:$PATH EOF
2.12 修改会话限制
1)备份配置文件
cp /etc/security/limits.conf /etc/security/limits.conf.bak

2、修改oracle会话限制
cat >> /etc/security/limits.conf << "EOF" oracle soft nproc 655350 oracle hard nproc 655350 oracle soft nofile 655360 oracle hard nofile 655360 oracle soft stack 102400 oracle hard stack 327680 EOF echo --------------/etc/pam.d/login----------------- echo cat >> /etc/pam.d/login << "EOF" session required pam_limits.so EOF --------------/etc/profile----------------- cat >> /etc/profile << "EOF" if [ $USER = "oracle" ] || [ $USER = "root" ]; then if [ $SHELL = "/bin/ksh" ]; then ulimit -p 16384 ulimit -n 65536 else ulimit -u 16384 -n 65536 fi fi EOF
su – oracle
cd /soft/
unzip LINUX.X64_193000_db_home.zip -d $ORACLE_HOME
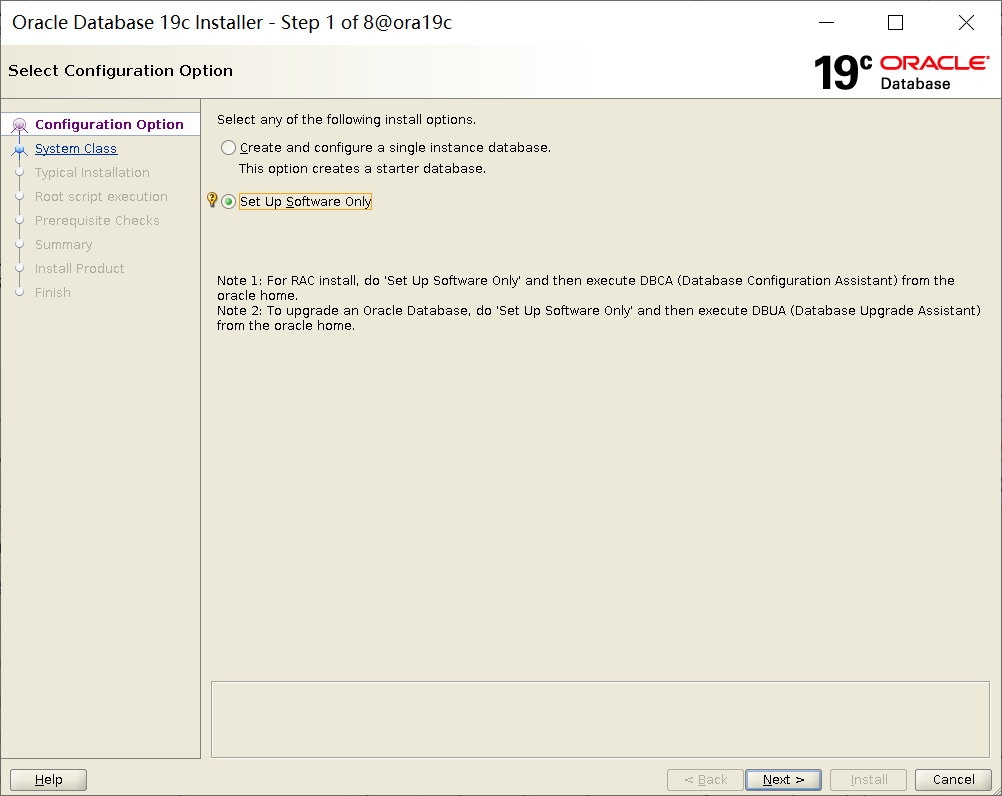
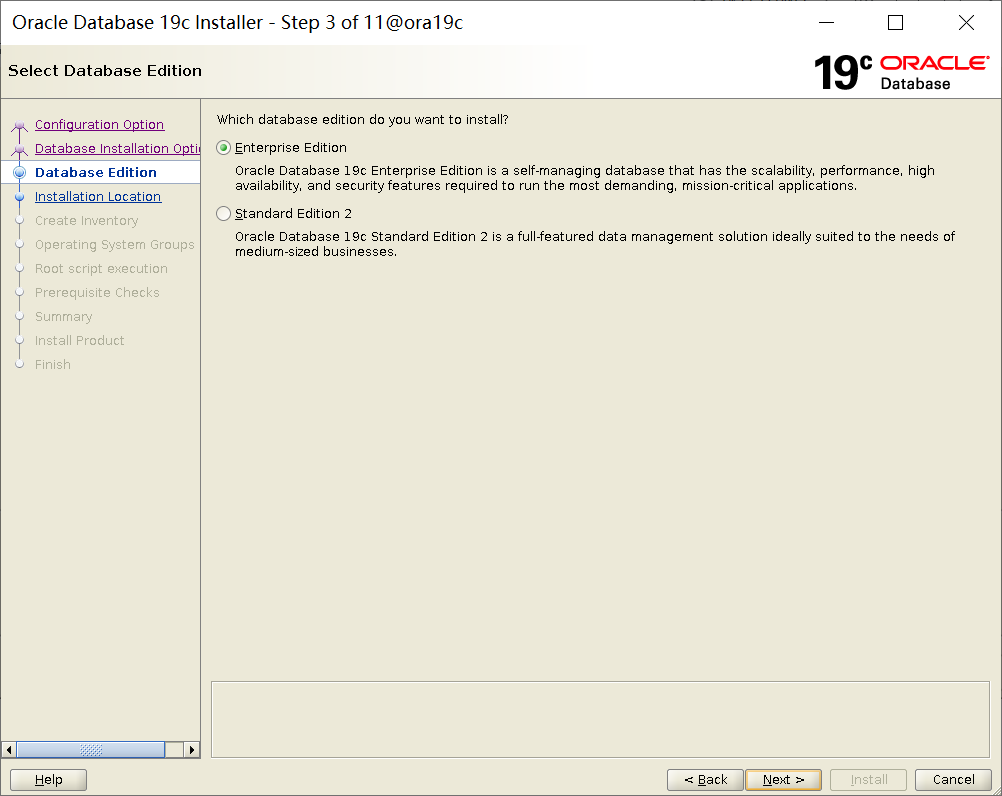
3.2 安装db soft
$ORACLE_HOME/install/response/db_install.rsp
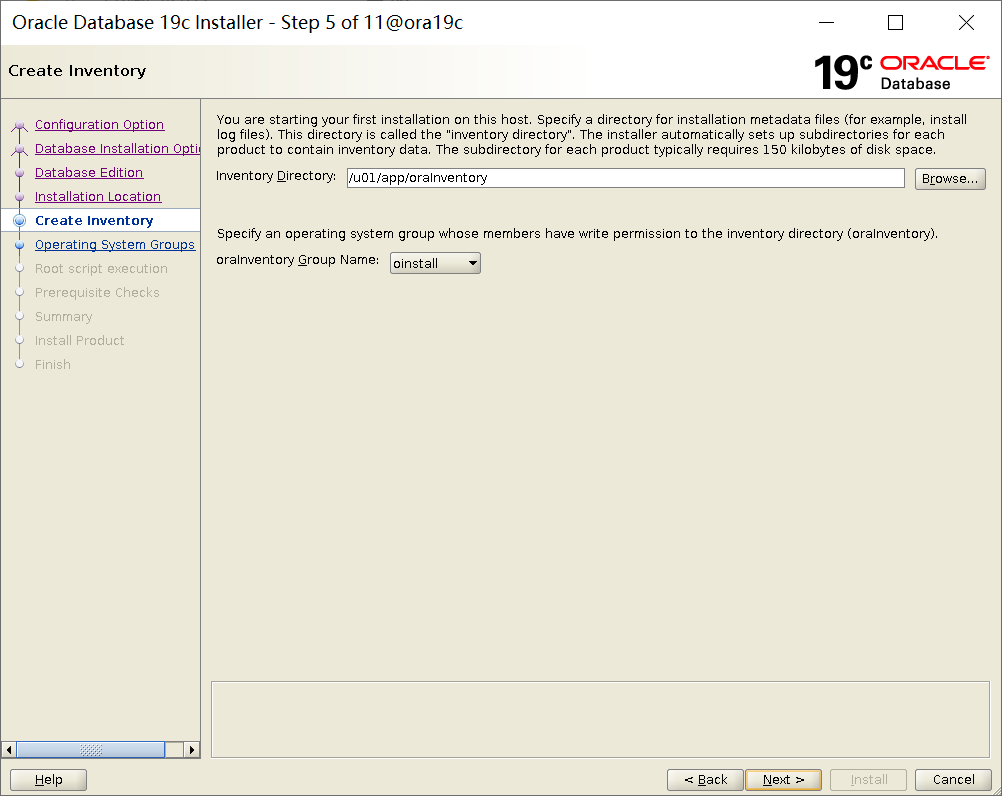
oracle.install.responseFileVersion=/oracle/install/rspfmt_dbinstall_response_schema_v19.0.0
oracle.install.option=INSTALL_DB_SWONLY
UNIX_GROUP_NAME=oinstall
INVENTORY_LOCATION=/u01/app/oraInventory
ORACLE_HOME=/u01/app/oracle/product/19.3/dbhome_1
ORACLE_BASE=/u01/app/oracle
oracle.install.db.InstallEdition=EE
oracle.install.db.OSDBA_GROUP=dba
oracle.install.db.OSOPER_GROUP=oper
oracle.install.db.OSBACKUPDBA_GROUP=backupdba
oracle.install.db.OSDGDBA_GROUP=dgdba
oracle.install.db.OSKMDBA_GROUP=kmdba
oracle.install.db.OSRACDBA_GROUP=racdba
oracle.install.db.rootconfig.executeRootScript=false
--设置兼容性, 解决[INS-08101] Unexpected error while executing the action at state: 'supportedOSCheck'
export CV_ASSUME_DISTID=RHEL7.6
cd $ORACLE_HOME
--安装前检查
./runInstaller -executePrereqs -silent -responseFile /u01/app/oracle/product/19.3/dbhome_1/install/response/db_install.rsp
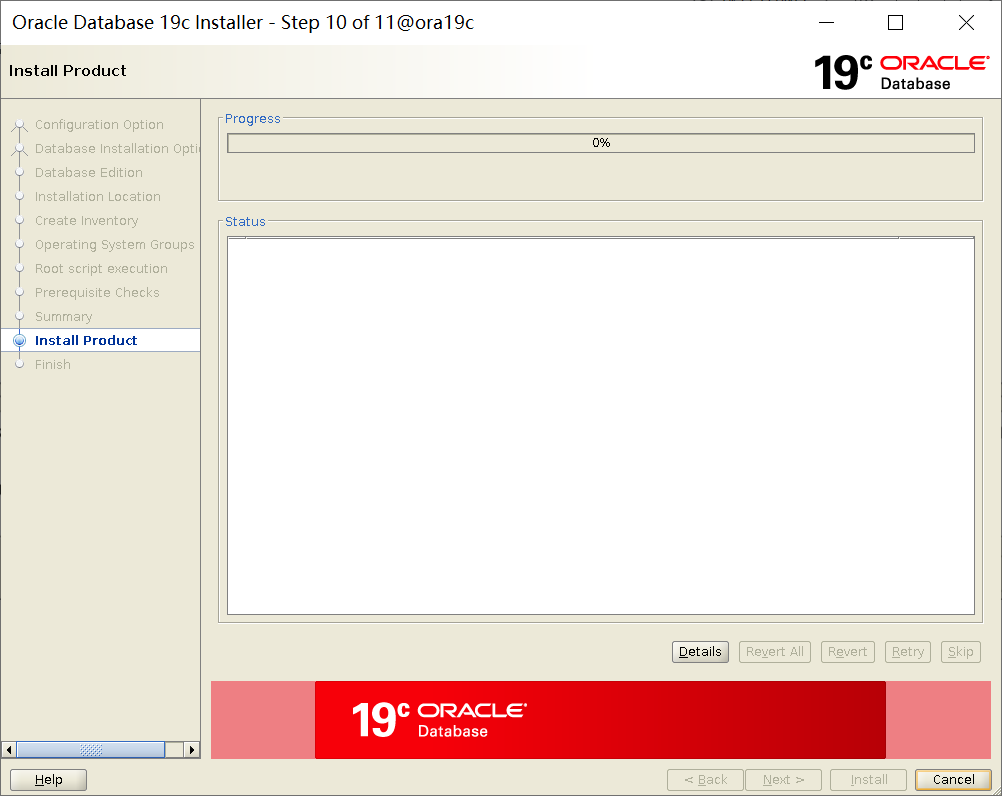
--安装DB软件
./runInstaller -silent -responseFile /u01/app/oracle/product/19.3/dbhome_1/install/response/db_install.rsp -skipPrereqs
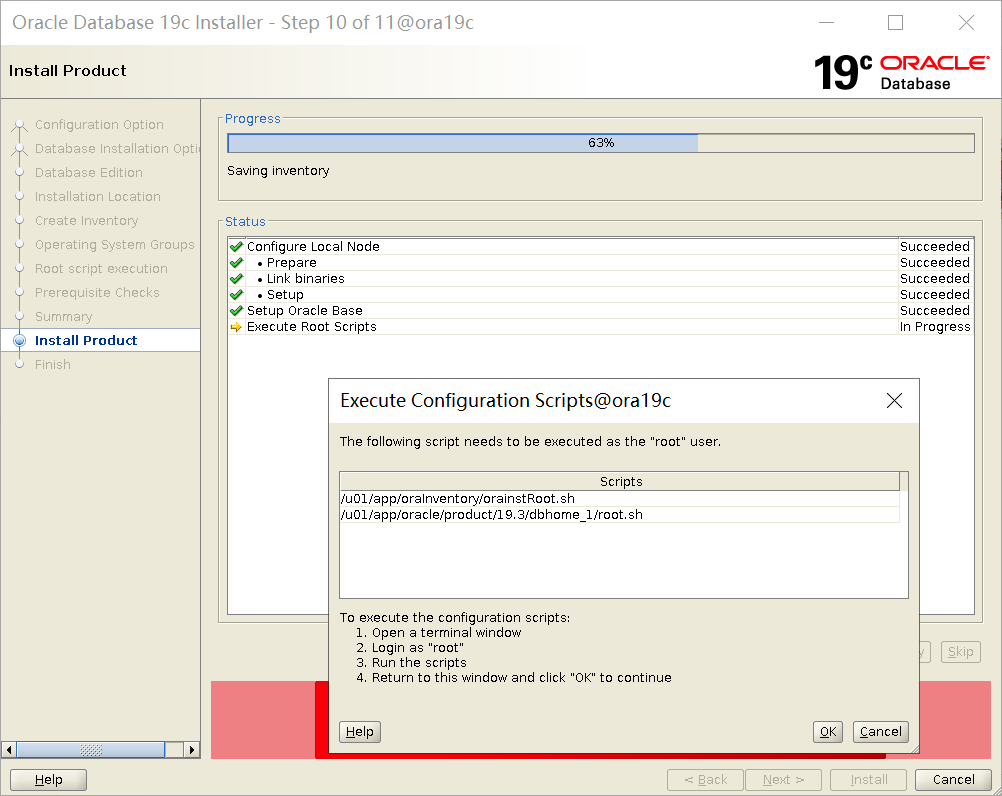
--执行root.sh脚本
[root@ora19c ~]# /u01/app/oraInventory/orainstRoot.sh
Changing permissions of /u01/app/oraInventory.
Adding read,write permissions for group.
Removing read,write,execute permissions for world.
Changing groupname of /u01/app/oraInventory to oinstall.
The execution of the script is complete.
[root@ora19c ~]# /u01/app/oracle/product/19.3/dbhome_1/root.sh
Performing root user operation.
The following environment variables are set as:
ORACLE_OWNER= oracle
ORACLE_HOME= /u01/app/oracle/product/19.3/dbhome_1
Enter the full pathname of the local bin directory: [/usr/local/bin]:
The contents of "dbhome" have not changed. No need to overwrite.
The contents of "oraenv" have not changed. No need to overwrite.
The contents of "coraenv" have not changed. No need to overwrite.
Creating /etc/oratab file...
Entries will be added to the /etc/oratab file as needed by
Database Configuration Assistant when a database is created
Finished running generic part of root script.
Now product-specific root actions will be performed.
Oracle Trace File Analyzer (TFA - Standalone Mode) is available at :
/u01/app/oracle/product/19.3/dbhome_1/bin/tfactl
Note :
1. tfactl will use TFA Service if that service is running and user has been granted access
2. tfactl will configure TFA Standalone Mode only if user has no access to TFA Service or TFA is not installed
安装时提示[INS-08101] Unexpected error while executing the action at state: 'supportedOSCheck'
报错的主要原因是OS 操作系统不兼容问题
通过以下方法解决
export CV_ASSUME_DISTID=RHEL7.6
3)清理环境重新安装
    rm -rf /u01/app
    rm -rf /etc/oracle
    rm -f /etc/init.d/init.cssd
    rm -f /etc/init.d/init.crs
    rm -f /etc/init.d/init.crsd
    rm -f /etc/init.d/init.evmd
    rm -f /etc/oraInst.loc
    rm -f /u01/app/oracle/oraInventory
    rm -rf /etc/oratab
    rm -rf /tmp/Ora*
4)DBCA静默文件
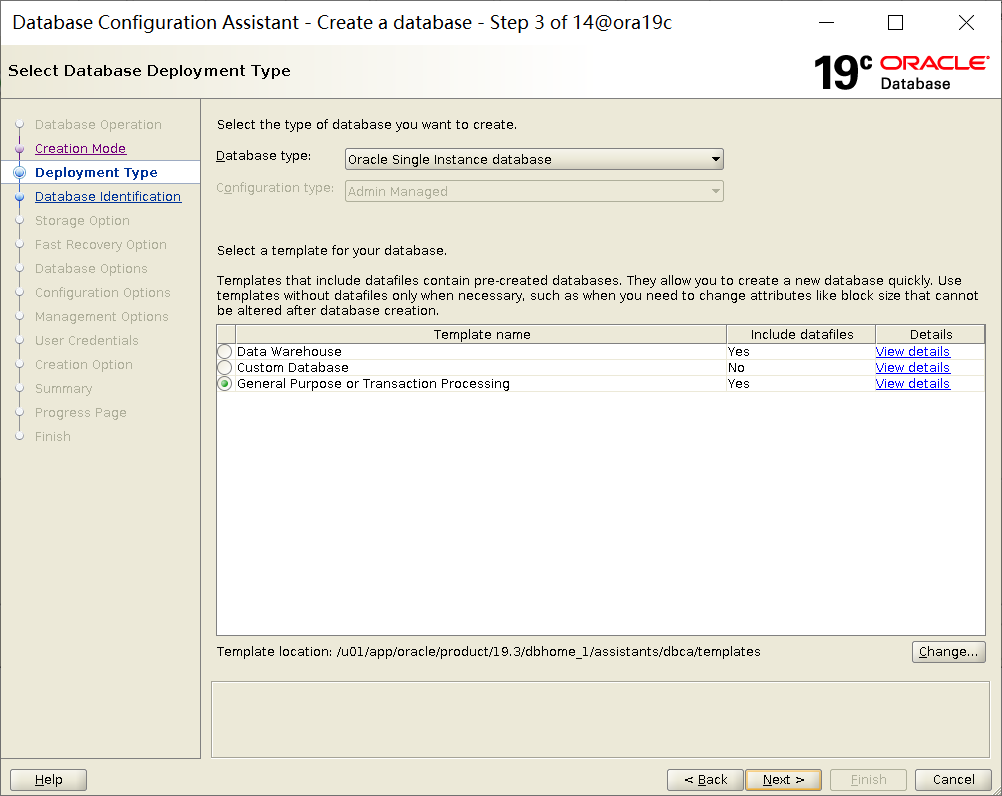
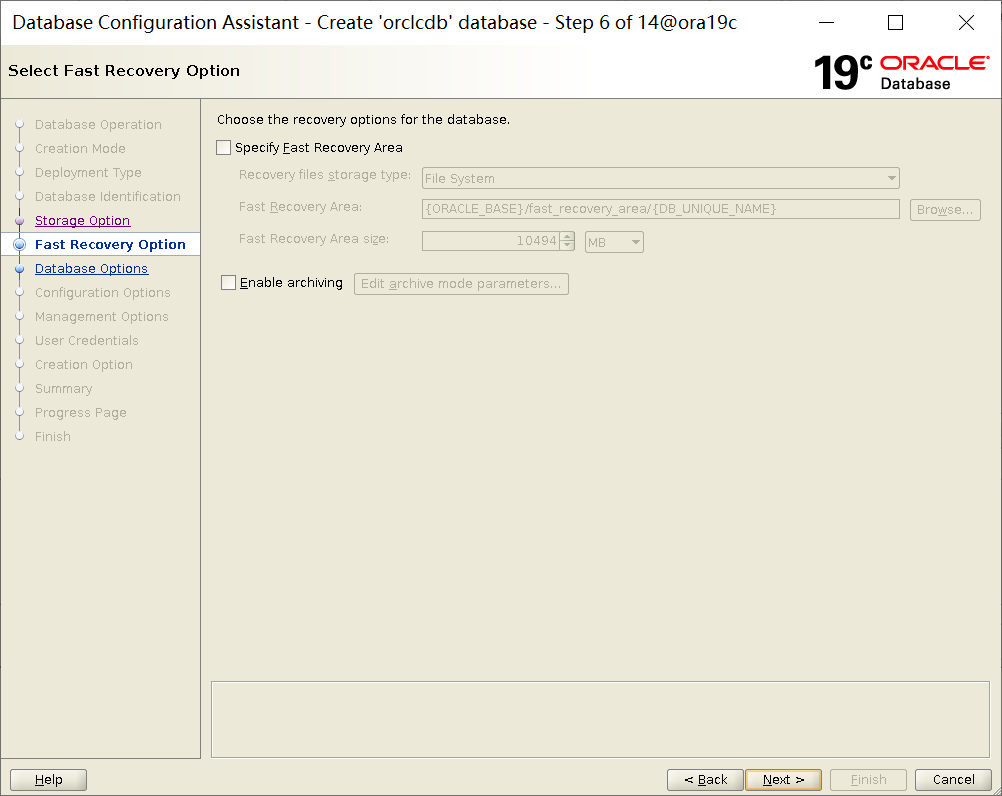
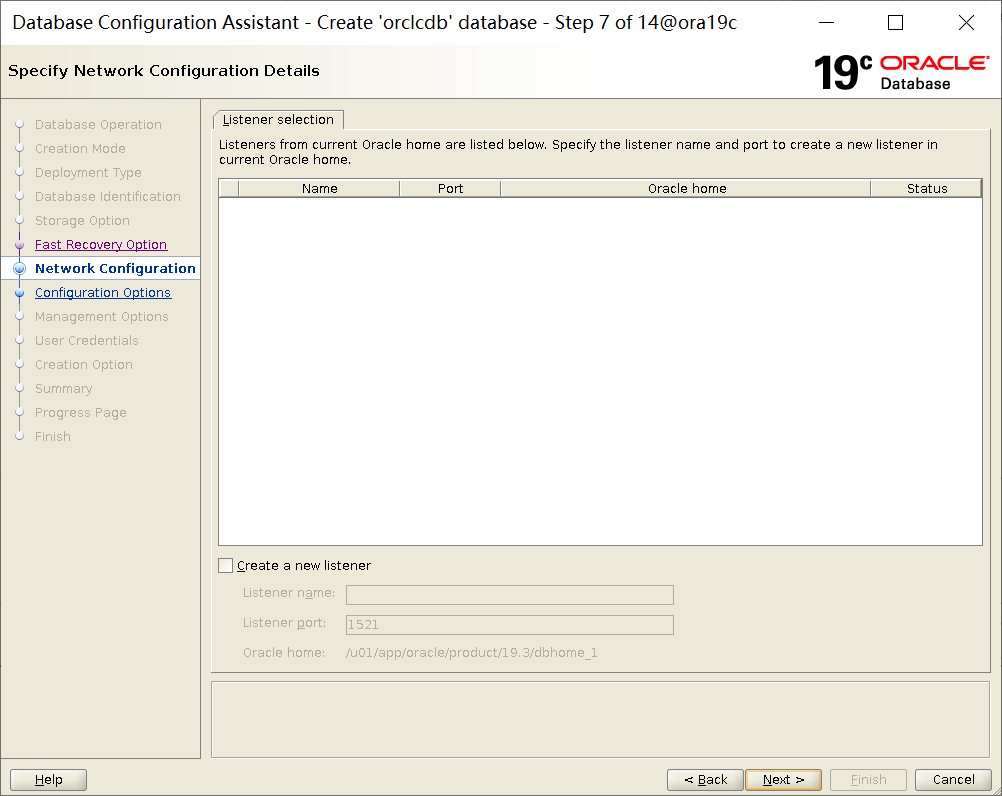
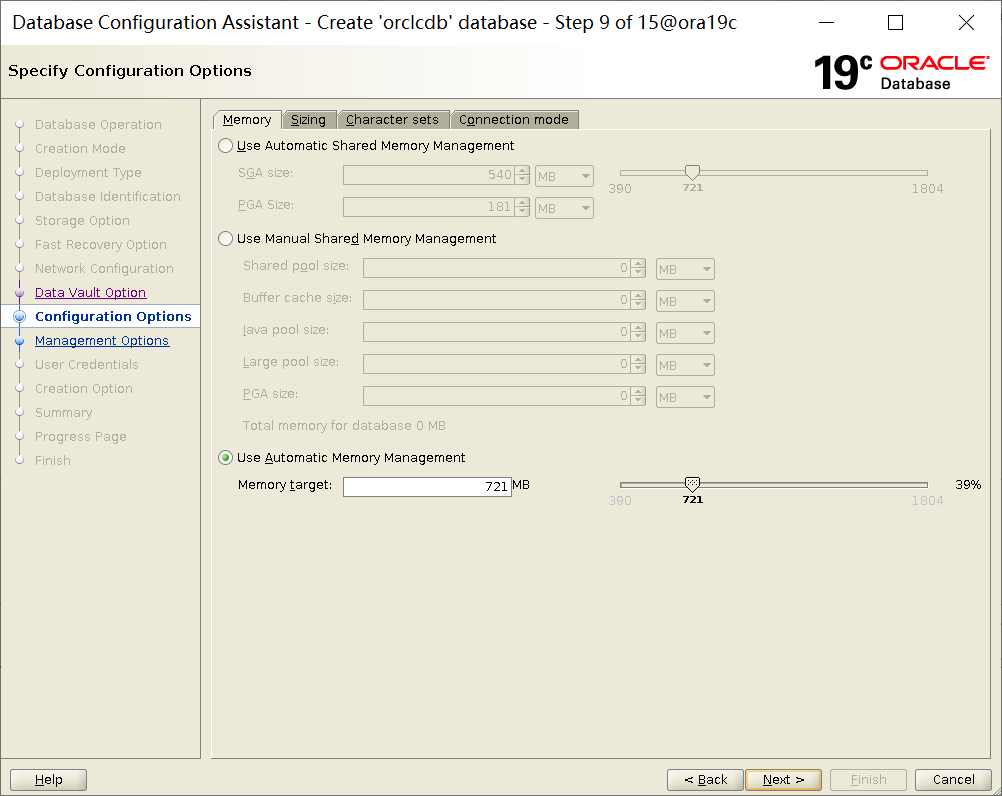
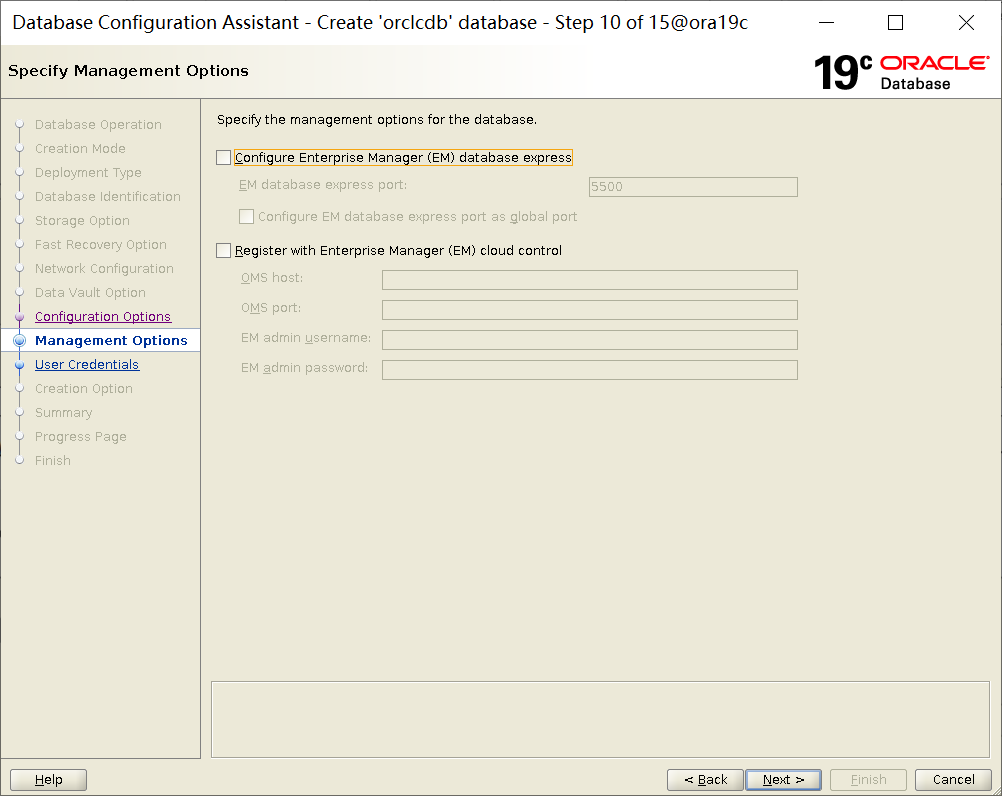
--配置文件
$ORACLE_HOME/assistants/dbca/dbca.rsp
--配置内容
responseFileVersion=/home/oracle/rspfmt_dbca_response_schema_v19.0.0
gdbName=orclcdb
sid=orclcdb
sysPassword=oracle
oracleHomeUserPassword=oracle
templateName=General_Purpose.dbc
emExpressPort=5500
totalMemory=800
sysPassword=Oracle123
systemPassword=Oracle123
datafileDestination=/u01/app/oracle/oradata
characterSet=ZHS16GBK
nationalCharacterSet=AL16UTF16
databaseType=OLTP
createAsContainerDatabase=true
5)创建实例
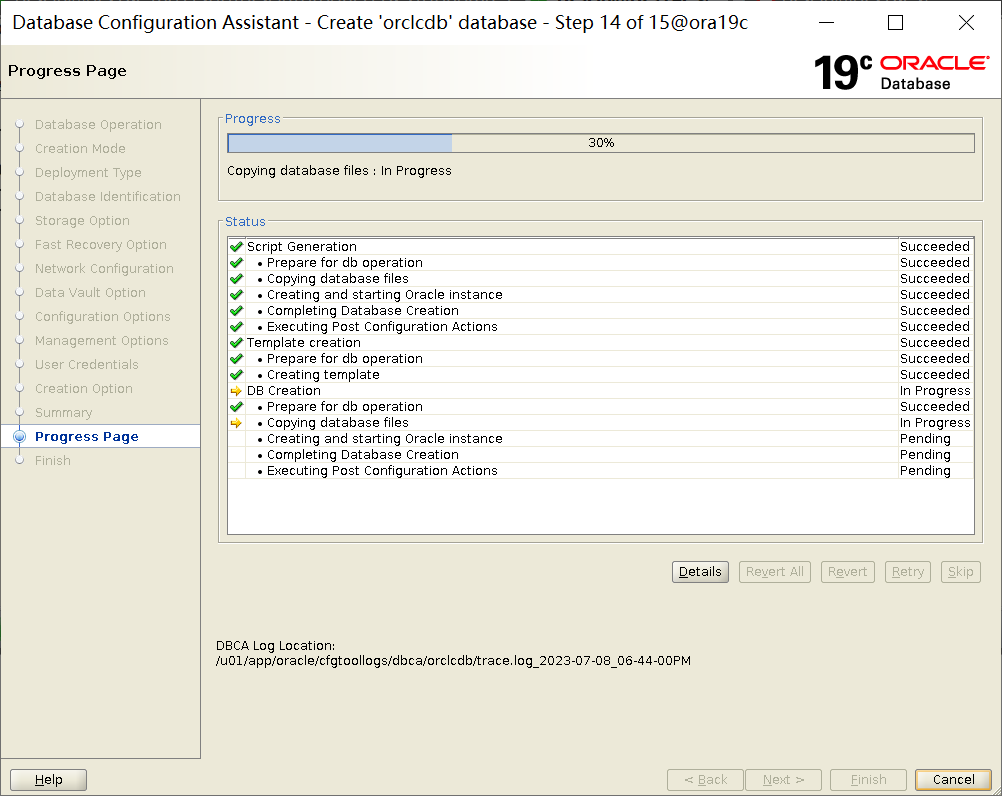
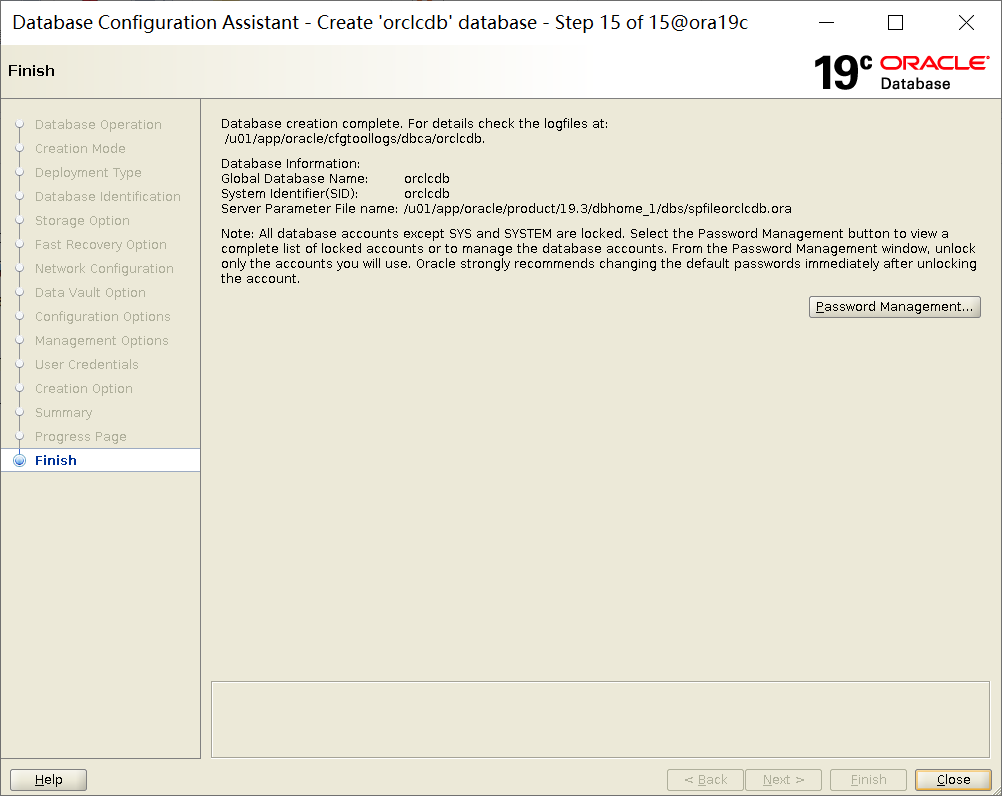
$ dbca -silent -createDatabase -responseFile $ORACLE_HOME/assistants/dbca/dbca.rsp
Prepare for db operation
10% complete
Copying database files
40% complete
Creating and starting Oracle instance
42% complete
46% complete
52% complete
56% complete
60% complete
Completing Database Creation
66% complete
69% complete
70% complete
Executing Post Configuration Actions
100% complete
Database creation complete. For details check the logfiles at:
 /u01/app/oracle/cfgtoollogs/dbca/orclcdb.
Database Information:
Global Database Name:orclcdb
System Identifier(SID):orclcdb
Look at the log file "/u01/app/oracle/cfgtoollogs/dbca/orclcdb/orclcdb.log" for further details
[root@ora19c ~]# export DISPLAY=192.168.3.245:0.0
[root@ora19c ~]# xterm
export CV_ASSUME_DISTID=RHEL7.6

[oracle@ora19c ~]$ cd $ORACLE_HOME
[oracle@ora19c dbhome_1]$ ./runInstaller
ERROR: Unable to verify the graphical display setup. This application requires X display. Make sure that xdpyinfo exist under PATH variable.
Launching Oracle Database Setup Wizard...


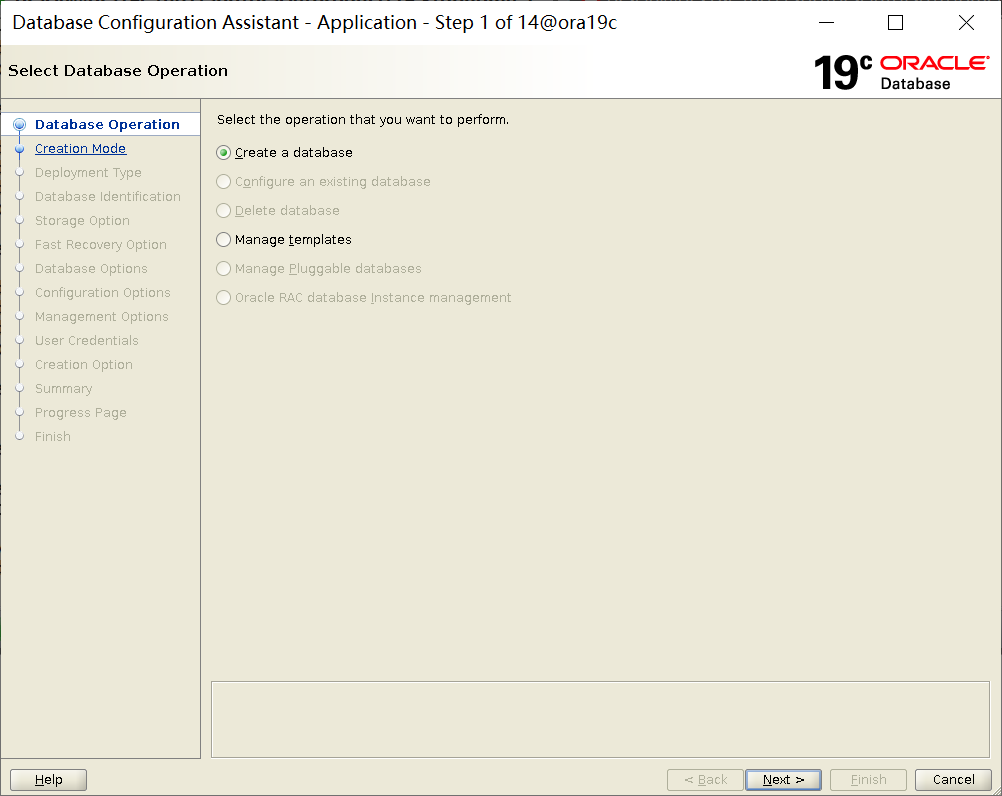
[oracle@ora19c dbhome_1]$ dbca


1、DBCA在配置内存过程中报错
DBCA failed with DBT-50000 & DBT-50001
解决方案:
Please apply the one-off patch for BUG 30827849 via https://updates.oracle.com/download/30827849.html.
Or you can apply DB RU19.12 and later.
Or you can use below workaround to run dbca.
COMMAND: dbca -J-Djava.io.tmpdir=
E.g: ./dbca -J-Djava.io.tmpdir=/home/oracle/tmp
[root@oracle19c03 ~]# cat /proc/swaps
Filename                                Type            Size    Used    Priority
/dev/nvme0n1p2                          partition       2145276 668672  -2
/root/swapfile                          file            499996  0       -3
[root@oracle19c03 ~]# free -m
              total        used        free      shared  buff/cache   available
Mem:           2814         623         700           0        1489         720
Swap:          2583         653        1930


